Share "Forcing Spring Blooming Bulbs in Winter"
It's easy to enjoy a burst of spring even when temperatures are freezing and snow is falling if you force spring-blooming bulbs to flower. This can be a great way to enjoy gardening indoors long before it is time for spring planting, and winter flowers will brighten any room.
Flowers to Force
Many different bulbs can be forced to bloom in winter. While amaryllis and paperwhites are some of the most popular choices because the bulbs do not need to be chilled in order to flower appropriately, other flowers that can be encouraged to bloom include…
- Crocuses
- Daffodils
- Grape hyacinths
- Irises
- Snowdrops
- Tulips
While the preferred pot sizes, chilling periods and sunlight levels differ for different types of flowers, the overall process is the same and can easily be adjusted to meet each flowers' needs.
7 Easy Steps from Bulbs to Flowers
Taking care from start to finish will ensure beautiful blooms when you work to force bulbs to flower in winter conditions. For the best results…
- Buy Quality Bulbs
It takes a great deal of energy for a bulb to bloom, and the bulbs most likely to produce radiant winter flowers will be plump and as large as possible, without any bruises, nicks or deformities. Check bulbs for any signs of mold or rot, and buy only the freshest, highest quality bulbs.
- Use a Proper Pot
Winter bulbs do not need a great deal of depth to flower, but there should be some room for root growth in the pot. The best pot will be 2-3 times as deep as the bulb is tall, and there should be adequate drainage so bulbs do not soak in water, which will cause rotting.
- Plant Bulbs Appropriately
Opt for a good quality potting mix for forcing bulbs, and fill the pot half-full before adding the bulbs. Plant bulbs points up, and layer several types of bulbs in the same pot if they have similar growing needs. Bulbs should be planted no more than 1/2 an inch apart for the best appearance, and they should be covered with soil until just their tips are showing.
- Water Thoroughly
After planting, the bulbs should be watered thoroughly so the soil is consistently moist but not sopping wet. The pot will need to be kept moist so the bulbs can develop strong roots for adequate nutrition.
- Chill Out
Most bulbs require at least 3-4 months of cold to trigger blooming. The temperature needs to remain consistently cold but without risk of freezing. An unheated basement or attic can be the perfect location, or a designated spot in the refrigerator. Cover the pot with a paper bag or craft paper to keep it dark without smothering the bulbs.
- Monitor Regularly
Check the cooled pots regularly to be sure the soil is moist, and continue watering as necessary if they are drying out. Also be aware of any temperature fluctuations and take steps to keep the pots at a consistent level of coolness.
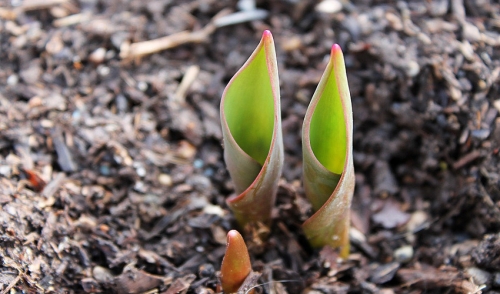
- Move When Growth Appears
When the first leaf tips appear from chilled bulbs, it is time to move the pots to slightly warmer, sunnier conditions. Avoid immediately placing the pots in a very warm room with abundant direct sunlight, but instead give the pots a chance to warm gradually and adjust to their new conditions – just as spring arrives gradually, your artificial spring needs to be gradual for the best blooms. In 2-4 weeks, the flowers will be bold and beautiful!
It can be a challenge to encourage spring-flowering bulbs to bloom out of season, but it is not impossible. After the blooms are finally spent, it is unlikely the bulbs will be able to rebloom – the forcing process is too stressful – and it may be better to simply compost the remnants. At that time, the weather should be warming up, and it will soon be time to enjoy even more bulbs and flowers outdoors.